In this lesson, you will learn how to add life to your maps. There's a lot of words and pictures in this tutorial, but it really isn't a lot of content to learn, so bear with me here.
Panorama Graphics
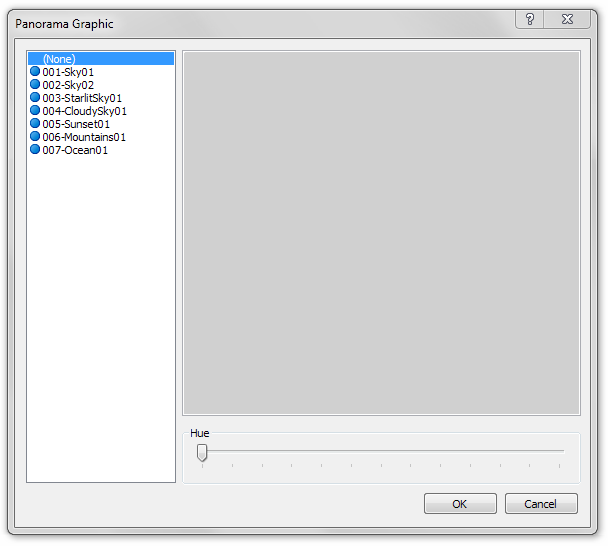
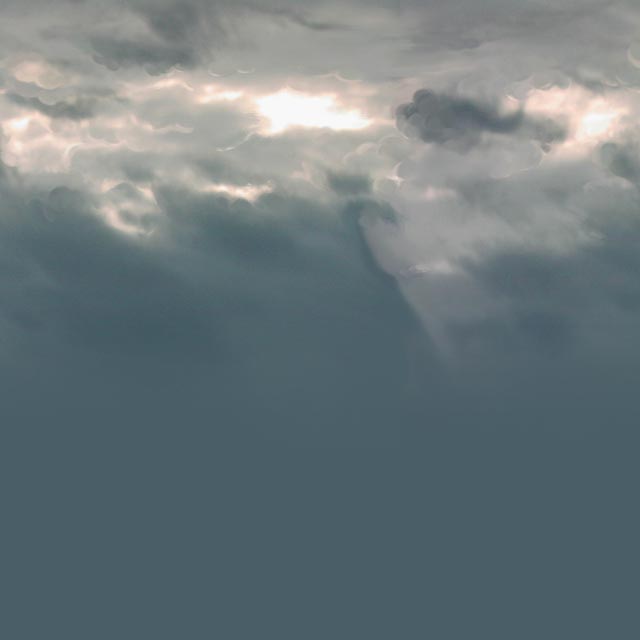
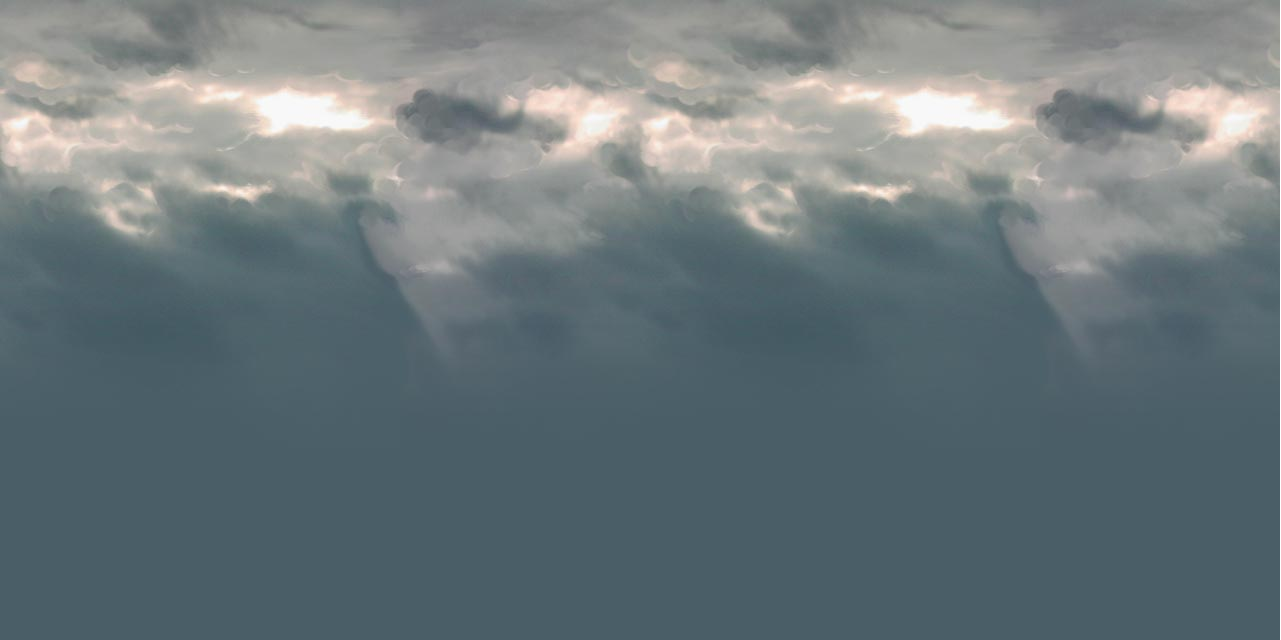
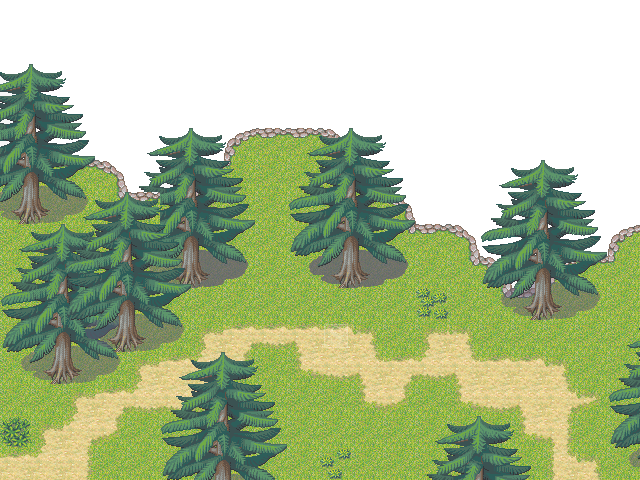
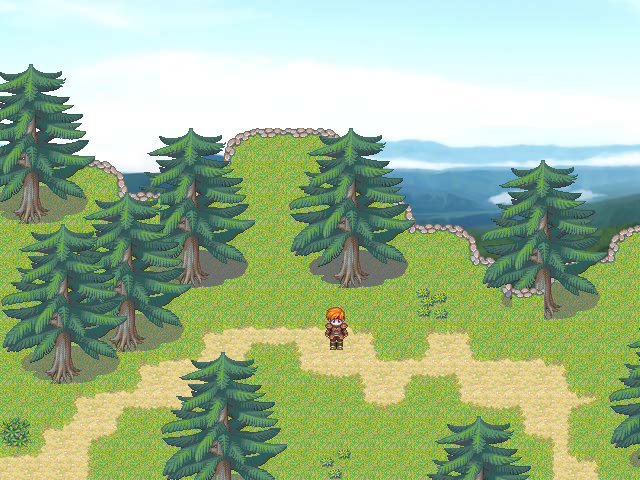
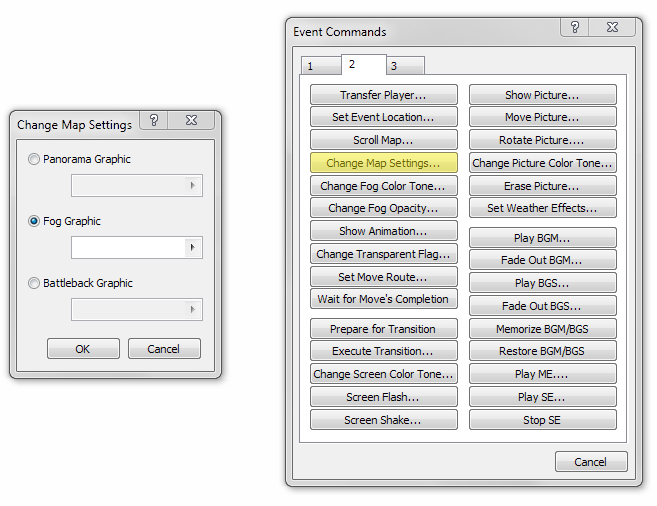
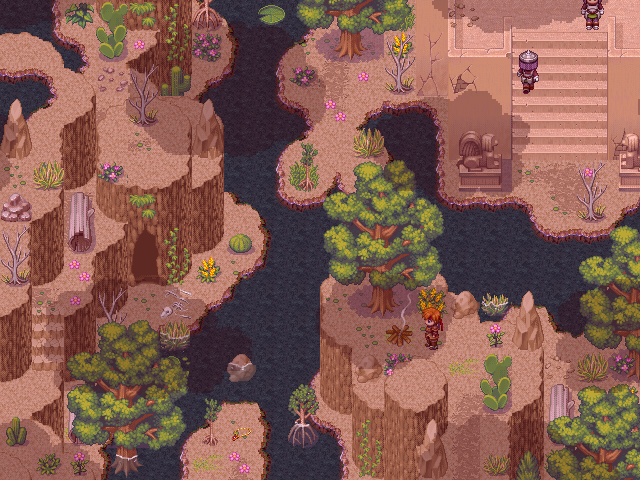
First up, let's go over the two map settings that are important to the atmosphere of your maps: Panorama graphics and Fog Graphics. To change these, we use an event command. Let's go over the panorama graphic first. When we click on the Panorama graphic box, a window pops up. To the left, there is a list of tiling panoramas. When you select one, it is displayed in the box to the right. Below the box is a slider bar that changes the hue of the panorama before it is displayed. Right now you may be wondering what I mean by tiling (as in tile) panoramas. These are graphics that can be connected over and over again side by side without looking weird. Take a look at this panorama graphic: When we put two of these side by side, the result is this seamless double in size panorama: If you hadn't seen the panorama by itself, you wouldn't have been able to tell that it was a tiled image. Pretty cool huh? All of the default panoramas are horizontally tile-capable. They (obviously) don't tile vertically. :3 So pick a sky panorama, and make sure the event's trigger is parallel process. Now then, we've set the Panorama for this map, but how do we map to make sure the Panorama shows? Simple. The Panorama graphic will display on all blank tiles. So if we make a mountain map like this: It will yield this in-game: Don't mind the crappy map and errors. This was just a quickie to use as an example.
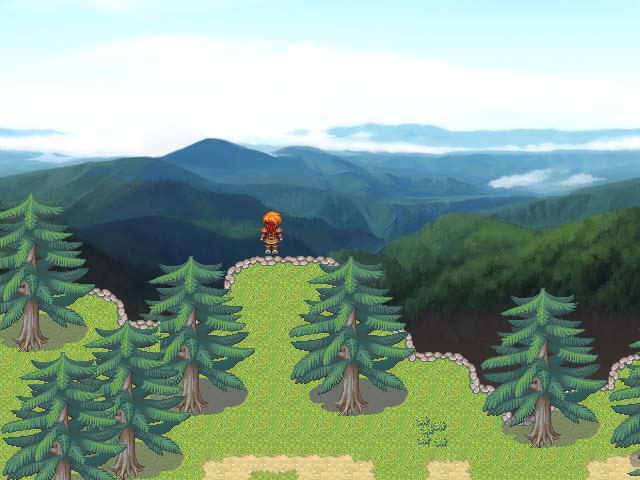
The trick with these panoramas is to add a little extra height to your map at the top. This way, when the player walks up, the screen moves up. This will let him or her look over the edge of a cliff a little bit more. Take a look at this:
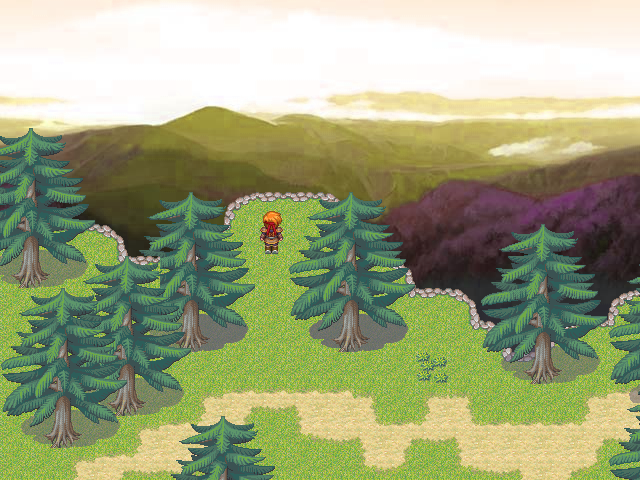
See? You can see more of the mountains now that Aluxes is at top of the map. This adds a cool effect to your game, and looks awesome in cut-scenes. You can play around with the panorama hue if you want, but it will rarely make it look better. I moved the slider to right here to get a sunset type effect:
However, as you can see, it does affect the quality of the panorama. You're better off just using photoshop to edit it. Play around with Panoramas, and you'll be making better maps in no time!
Fog Graphics
Now let's move on to the second map setting that is important to the atmosphere of your maps, Fog graphics.
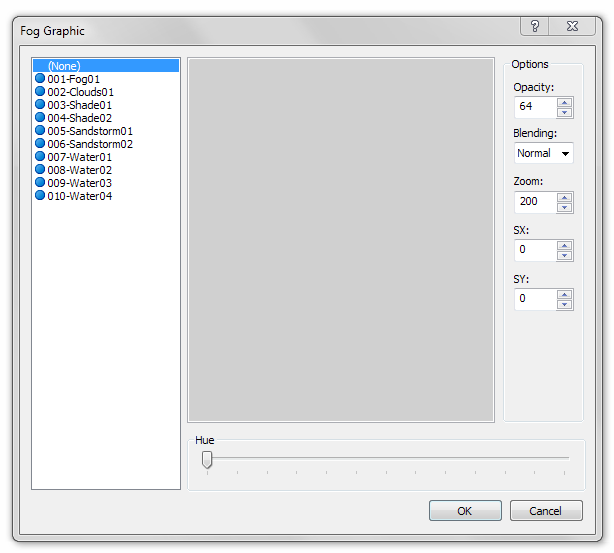
Clicking the Fog graphic box brings up a window similar to the one from before, except now there are a few options on the right side of the preview-box. Options:
Opacity - With this option, you can enter a number between 0 and 255. 0 will make the fog invisible, and 255 will make it the only thing visible. Input a larger number to get a thicker fog.
Blending - If you don't know what this does, you don't need to know. You'll never need it, so there's no point explaining it.
Zoom - Here you can set the zoom percentage of the fog. 100 will keep it at its normal size, 200 will double its size. etc.
SX - SX stands for the x-axis speed of the fog. Basically, you can make the fog move to the left (negative number) or right (positive number). Larger numbers equals more speed.
SY - SY stands for the y-axis speed of the fog. Same deal here. Negative numbers move the fog down, positive numbers move it up.
Combining SY and SX - You can input a number in both the SY field and the SX field. This way, you can move the fog diagonally. Play around with it.
Here's an example of how a fog can make a map look better:
It may be a subtle difference, but it's a good difference. There are more fogs for you to use in different maps, such as underwater, in a forest or a sandstorm in a scorching desert. Just because this overlay graphic is called a Fog graphic doesn't mean it's always going to be a fog. There's also another much more complicated use for fogs: Cosmetic Lighting.
Screen Tone
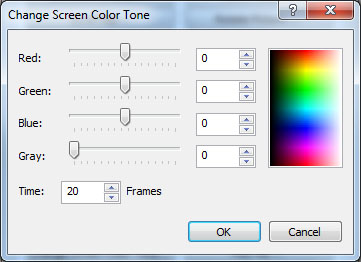
What else can we use to change the atmosphere of our maps? You may have noticed that the previously shown swamp map I made had a dark brown tint to it. This really made it look a lot more like a murky swamp didn't it? This was accomplished with a Screen Tone event command. Ahh... The screen tone command. Such a wonderful tool for us mappers. If you didn't know about this, you're in for a real treat. With this event command, we can add a tint of color (or remove the color) to/of our maps. It's pretty simple. Move the sliders around to the left or right to decrease or increase the amount of a particular color to the map. This can completely change the atmosphere of your map, and it can really make an okay map become an awesome map. But.. how do we know which numbers to use? You could input random numbers or move the sliders around randomly and constantly playtest your game to see which combinations you like, but that's a bit tedious, no? Well, thanks to my good friend Leon, we have a script that makes this so much easier for us.
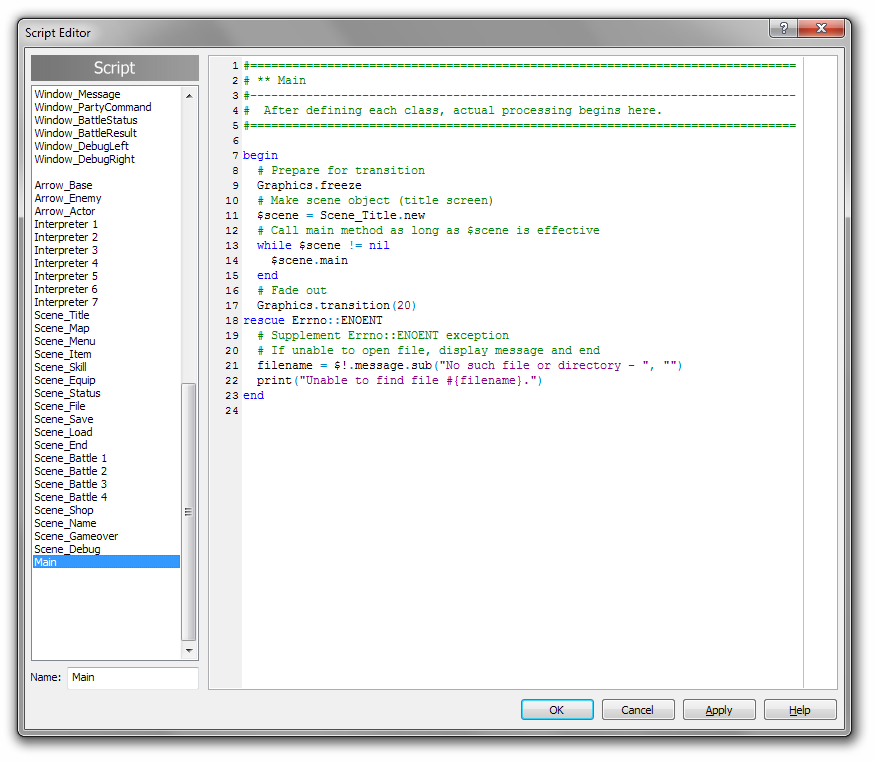
This is easily my favorite RPG Maker XP script of all time. So how does it work? First of all, put the script in your game.
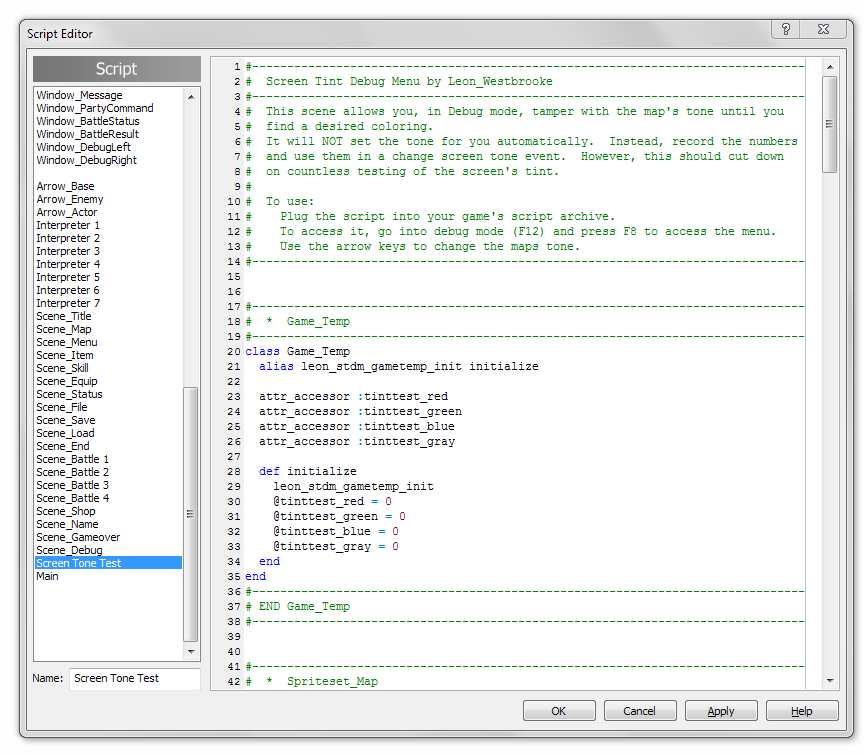
Quick Tutorial on how to input scripts if ya' don't know how
Click on the Edit Scripts button in the top toolbar. Right click on "Main" in the script list to the left and click insert. Type in the name of the Script (Screen Tone Test) in the name box, then paste the script in the box to the right. Press OK.
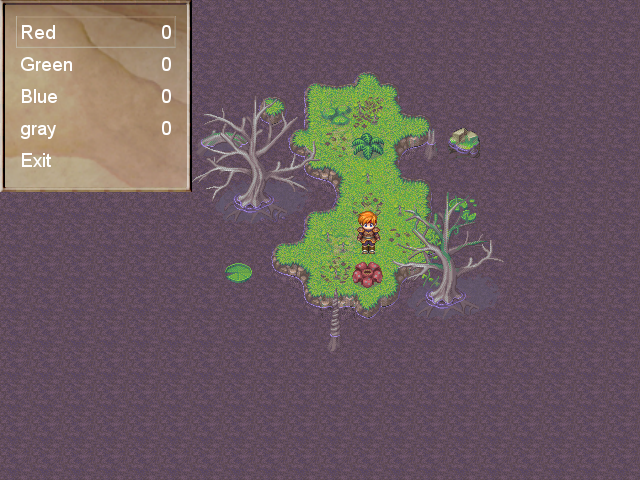
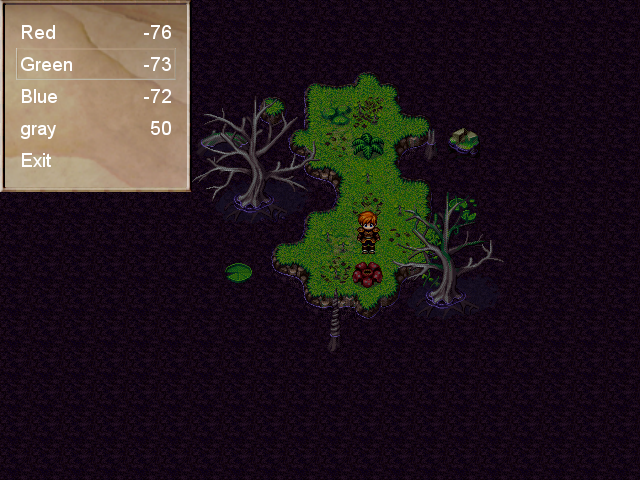
Now that you have the script in your game, play-test your game on the map that you want to find the right screen tone for. When you're on the map, press F8. This window will appear: Now play around with the numbers using the arrow keys. You should be able to find the tone you like pretty easily. Once you found the screen tone you like, record the numbers in notepad or something. This script will not change the screen tone for you. Now stop play-testing and head back into the editor. Make a new event, and enter in the numbers you recorded in a screen tone event command. Pretty easy huh? ^~^ Using this method will save you a lot of time, so go thank Leon for writing this.
Now that you know how to give your map a screen tone, I will end this tutorial with some screen tone suggestions for specific types of maps.


please provide the image of that valley, you use in the panorama.